Jean Galea

Health, Wealth, Relationships, Wisdom

  • Start Here
  • Guides
    • Beginner?s Guide to Investing
    • Cryptocurrencies
    • Stocks
    • P2P Lending
    • Real Estate
    • Forex
    • CFD Trading
    • Start and Monetize a Blog
  • My Story
  • Blog
    • Cryptoassets
    • P2P Lending
    • Real estate
  • Consultancy
    • Consult with Jean
    • Consult a Lawyer on Taxation and Corporate Setups
  • Podcast
  • Search

How to Record Your Padel Matches and Improve Your Game

Last updated: August 08, 20182 Comments

Whenever I have the opportunity, I like to record my padel matches. This has been an essential tool for me in identifying and correcting my mistakes.

Many people love the videos I upload to YouTube, and ask me how to do the same for their own matches, so in this post, I’ll be describing my process. You will see that it’s really simple and straightforward, and once you do, you’ll no doubt want to improve your game using this technique.

The fact that padel courts have transparent glass walls is a great bonus for players as it is really easy to attach a camera and record a match, especially when compared to other sports. It’s not so easy to do this for tennis, for example. You could buy a stand for your camera, but you always run the risk of a high-speed ball hitting your precious equipment. It’s certainly do-able, but not as easy and straightforward as in padel.

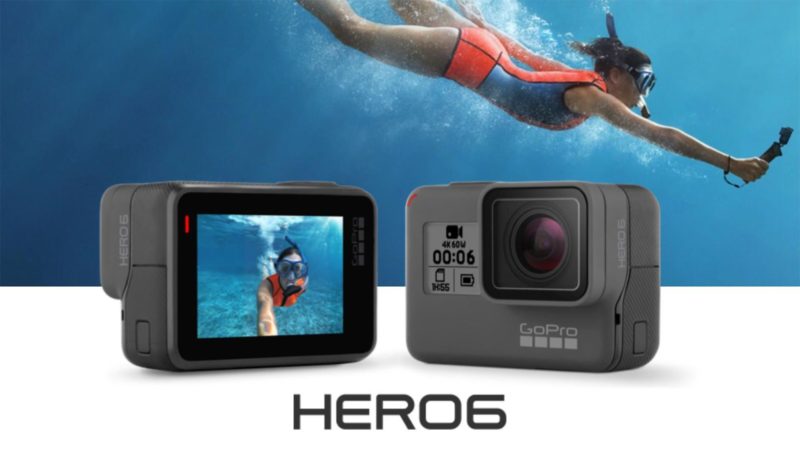
The latest and greatest version of the GoPro Hero action cam is out, and it’s a tremendous improvement over all previous versions. I had been using a GoPro Hero 3+ so far, but when I saw the features on the GoPro Hero 6 I instantly decided to buy it.

The two main features that make the upgrade worthwhile are the following:

  • touchscreen with video preview on the back of the camera
  • incredible image stabilization even at 4k

With the decision on buying the Go Pro Hero 6 being made, it was time to check out what accessories are worth buying. Everyone knows that a major part of the GoPro’s allure is its wide variety of accessories that enable you to film in almost any condition imaginable and attach the camera to anything.

First off, you will need a bunch of spare batteries. I recommend three spare batteries as a minimum if you’ll be getting any kind of frequent use from the camera. I use the camera during my travels and also for the filming of padel matches on a daily basis. I like to keep 4 spare batteries in the GoPro pouch, obviously making sure all the batteries are kept charged at optimal levels.

Equipment

  • GoPro Hero 6
  • GoPro Suction Cup
  • GoPro Hero camera case
  • 64GB MicroSD card
  • Spare GoPro Batteries

Software I use

  • Final Cut Pro
  • MPV player
  • YouTube (if you want to upload and share the videos)

Recording the Match

I make sure I get to the padel court around 20 minutes before the match, to have enough time to set things up and warm up. Once the other players arrive, I always ask them if it’s OK for me to record the match. So far nobody has refused or shown any displeasure, on the contrary, other players are typically very enthusiastic and ask me to share the YouTube link when I’m done editing and have uploaded it. Keep in mind that most players have never watched videos of themselves play, so they would be very happy to have this opportunity. Not to mention that it’s always cool to share your match with family and friends on social media 🙂

Next, I find a good place to attach the GoPro. As I mentioned in the equipment list, I always put the camera within its protective case and attach it to the suction cup mount. This mount allows me to easily attach the GoPro to the back wall of a padel court. If both sides are easily accessible, I choose the one which doesn’t face the sun. If the sun is low and facing the GoPro you will end up with potential flaring in the video and the quality won’t be that good.

Make sure all the screws are tight and if possible use the GoPro app on your phone to make a live connection to the GoPro and make sure that you’re happy with the angle of viewing. I typically record at 1080p/30fps, but if I need extra high quality I’ll record at 4k at 60fps. This will allow me to use slow-motion features during the editing process since I have extra frames to play with. You can also increase the frames up to 120fps.

With the GoPro securely attached, and once I’m happy with the angle, I will hit the record button on the camera, and forget about it. It’s time to concentrate on the actual match!

The only thing to keep in mind while playing is that the battery will be drained after around an hour of play, so keep those extra batteries handy, and just change the battery during the change of sides after every hour. I typically use two batteries per match, unless its a very long match that warrants use of the third battery.

When you finish the match, just stop recording, carefully detach the GoPro from the wall and pack everything. Make sure you get the other players’ contact details so that you can send them the YouTube link later. This is a great way to build contacts in the padel world and make sure that people remember you 🙂

Editing the Match

For editing matches, I use Final Cut Pro on an Apple iMac 5k. There are many alternative video editors out there, but Final Cut has given me the best balance between usability and power. The process for editing is pretty simple. I first import the video files from the GoPro into Final Cut as the first step. Keep in mind that the GoPro will split videos into smaller chunks, and you can then make a compound clip in Final Cut to stitch them back together. Next, you will want to add a Color Correction effect clip onto your video. This will allow you to adjust saturation and exposure. You will always need to correct these, as the video will never be perfect out of the camera directly.

The next step is to add a fade in and fade out effect to both ends of the video, and the finishing touch is to add a title clip at the start of the video. I typically include the date and location of the match and the names of the players. With all that in place, it’s time to publish. I keep a local high-quality copy on my Synology Diskstation NAS, and the other I publish on YouTube. Both of these copies can be created from Final Cut Pro directly using the Share menu item.

Viewing the Match

You can, of course, share the match with all your friends once you’ve uploaded it to YouTube. You should also keep a high-quality copy on your own computer, and for viewing that I recommend MPV player. This is the only free player I’ve found that allows stepping forward and backward in a video clip. That means you can move forward or backward frame by fame and carefully analyze each point. I like to take a look at my sense of anticipation, which means how long I took to start moving into position after the opposing player lined up his shot. I also check my footwork and make sure that I am doing a split step before every shot by our opponents. These are the little details that can be analyzed, together with many more, when you step forward and backward.

That’s it! Hope you enjoy your recorded matches! Let me know if you have any questions about the setup or process.

Filed under: Padel

Here’s How a Professional Padel Player’s Daily Routine Looks Like

Published: October 11, 2017Leave a Comment

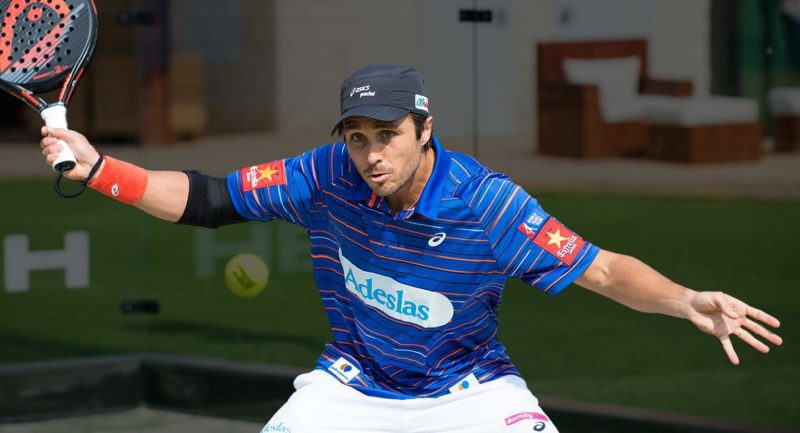
Ever wondered how a padel professional splits his day? There is no one better to follow than the world champion for 14 years, Fernando Belasteguin.

In the video below, he shares his typical timetable:

07:15 – 08:00 Wake up & Breakfast

08:30 – 10:30 Physical Training

11:00 – 13:00 Padel Training, followed by stretching

13:30 -14:00 Back at home, lunch, siesta and the rest of the day with the kids

22:30 Bedtime

YouTube video

Interesting, he also emphasizes how important it is for him to get a good night’s sleep every single day. During the year when his first son was born, he was waking up during the night due to the baby’s crying, and he started to suffer from various injuries. Doctors advised him to wear ear plugs and that resulted in him getting much better sleep and less injuries. Of course, he also thanks his wife who is 100% supportive of his profession and takes care of the kids herself at night so that he can get a good night’s rest.

Filed under: Padel

The Best Padel YouTube Video Tutorial Channels

Published: September 18, 20171 Comment

If you want to improve at padel, the best way to do so is to get a private padel coach and have regular lessons, play as many matches as you can and also make sure you are at peak fitness. However, when we’re not training and resting our bodies, we can still continue improving at padel by watching matches and tutorials on YouTube.

Here are the best YouTube and Vimeo padel tutorial channels:

Rafa Galvez Padel

YouTube video

Rafa Galvez is a padel coach with many years of experience. He started off as a tennis coach and later moved on to padel. He has some excellent video analysis of WPT matches, as well as a very nice collection of fitness for padel videos.

Manu Martin – Mejora Tu Padel

YouTube video

Probably the hottest padel channel at the moment, Manu combines padel tips with shots from his life and that makes it very interesting. Manu is the coach of the popular Alejandra Salazar and also Gaby Reca.

Paquito Navarro – DaleCandelaTV

YouTube video

Paquito Navarro needs no introduction, he is currently the no.1 ranked Spanish player in the World Padel Tour. He’s also a very friendly and funny person, and this character shines through in his padel videos. In every video he teaches us a new shot. I find these videos to be really entertaining and great if you want to learn how to hit the ball from a padel champion.

Rodrigo Ovide – Herbalife Padel Tutorials

Herbalife is one of the main sponsors of World Padel Tour and they have created a series of videos explaining the main padel shots. Rodrigo Ovide, one of the most well known padel coaches, is the one who explains the technique in these videos.

Miguel Sciorilli – Arena Entrena Padel

Miguel Sciorilli is another very well known coach, he was the trainer of padel number one Fernando Belasteguin for many years.

Hugo Cases

YouTube video

Another padel coach that has created a series of good videos to learn the basics in his YouTube channel.

Mauri Andrini – Hello Padel

YouTube video

Mauri Andrini teaches us the basic steps and positions in padel. The best thing about these videos is that they are in English and are very well produced.

Padel Trainer

YouTube video

This is probably the best padel channel in the English language. They also sell a padel course on Vimeo, so make sure you check this channel out if you don’t understand Spanish.

I also found this hour long padel theory talk which is very interesting too, and again it’s from the Padel Trainer guys and presented in English.

YouTube video

Unfortunately most padel YouTube tutorial videos are in Spanish, so you’re out of luck if you can’t understand a word. On the other hand, it’s a great incentive for you to learn Spanish, which is a very useful language to know. As we have also seen, there are also some new channels that teach padel in English, and I’m sure we’ll be seeing more channels in English as padel continues to expand throughout Europe and the United States.

Do you have any other favourite padel channels that I missed? Let me know in the comments section.

Filed under: Padel

How to Add an Overgrip to a Padel Racket

Published: September 14, 20175 Comments

The grip of a padel racket is very important part of our padel equipment collection for obvious reasons. Having a bad grip can cause us to lose the feel of the racket or have it move around too much in our hands while hitting shots.

A good grip has the following characteristics:

  • Comfortable fit according to the size of your hand and personal preference.
  • Absorbs shocks when hitting the ball.
  • Absorbs sweat well.

The best grips are the white ones. Many people prefer the colored ones as they might match the racket’s color scheme better, however you should know that since the non-white grips are injected with ink, they lose some of their porosity and hence they don’t absorb sweat that well. The end result will be more slipping of the grip causing a lack of confidence with your racket and more mistaken shots.

There are two types of grips: the grip and the overgrip. The undergrip has a sticky side and every racket comes with one installed. Most players just add overgrips over the undergrips to suit their palm size. Some players prefer to change the undergrip itself and install one they like better. A famous example is Paquito Navarro who only uses the undergrip on his racket, without any overgrip.

Other players can add up to 5 overgrips, especially if they are battling injuries such as tennis elbow. Each overgrip reduces vibrations a bit more, so it will help players that have this issue. However each overgrip also lessens the feeling that you have with the racket, so you need to balance the pros and cons and see what you like best. I can tell you from experience that even having one extra grip can alter your play negatively in a significant way as you won’t feel as confident hitting the ball, resulting in many more mistakes. I tend to use a grip with two thin overgrips or one thin and one thick overgrip. I have quite a big hand. The general rule is that when you wrap your fingers around the handle there should be extra space to fit a finger between the top fingers and the bottom of your palm. Of course, this is just a general rule; use whatever you feel most comfortable with.

Let’s take a look at some videos on how to install grips.

First up is this video from Paddelea showing the most common way of installing overgrips:

YouTube video

Second up is Mati Diaz, who installs his grip in a peculiar way. He installs it the other way round to the most common way of installing it:

YouTube video

Next up is Paquito Navarro, who, as mentioned earlier, removes his undergrip and replaces it with one of his preference. He does not add any overgrip as he prefers having maximum feel of the racket’s handle.

YouTube video

Grips typically cost between one and four euro, and the professionals tend to change grips every game. Amateurs can change it every few games, depending on how much their palms sweat. You can also buy gels or powders to reduce sweating in your hands and does prolong the life of your grips.

Filed under: Padel

My International Padel Experience in Rotterdam

Last updated: September 08, 2018Leave a Comment

Myself and Ole Muller, winners of Men’s B Category

During the past weekend I’ve had the chance to take part and play in the International Padel Experience tournament in Rotterdam.

Together with my partner Ole, I was really looking forward to my first experience playing and competing outside of Spain. Padel is the second most popular sport in Spain but it’s still in its early stages throughout the rest of Europe. I was therefore curious to see how the sport is picking up in the Netherlands.

We played at Padel club Victoria. They have 3 very nice padel courts and many players who converted to padel after playing other racket sports such as tennis and squash. It was very nice to chat with players from several countries and talk about their padel experience. I think in the coming years we will be seeing the definite explosion of this sport throughout Europe and many more new players.

Let’s get back to the IPE Rotterdam tournament, it was well organised. All the matches we had scheduled started on time and there was a very nice atmosphere at the club. Free beer was provided by sponsors Estrella Damm, although to be honest I would have preferred to have free water or at least a water fountain. We were lucky with the weather as it was hot and sunny during the whole three days, so it was very important to stay well hydrated while playing.

The tournament had four categories, Men A and B, Women, and Mixed. We took part in Men B, guided by the padel level guide available on the International Padel website. In reality we encountered players between levels 2 and 3.5 in this category, so there was quite a wide range. This led to some very easy matches against players who only started playing very recently. The final however was really hard and we thoroughly enjoyed it. We only managed to win at the very last moment after a super tense tie break that decided the match. After chatting with Luis from International Padel, I learned that every tournament is a bit different with regards to the players’ levels. For example, since padel is more established in countries like Spain and Portugal, the level is considerably higher. Luis therefore recommended that we stick to category B for our next tournament in Lisbon, Portugal.

[Read more…]

Filed under: Padel

  • « Previous Page
  • 1
  • …
  • 9
  • 10
  • 11
  • 12
  • Next Page »

Latest Padel Match

Jean Galea

Investor | Dad | Global Citizen | Athlete

Follow @jeangalea

  • My Padel Experience
  • Affiliate Disclaimer
  • Cookies
  • Contact

Copyright © 2006 - 2026 · Hosted at Kinsta · Built on the Genesis Framework