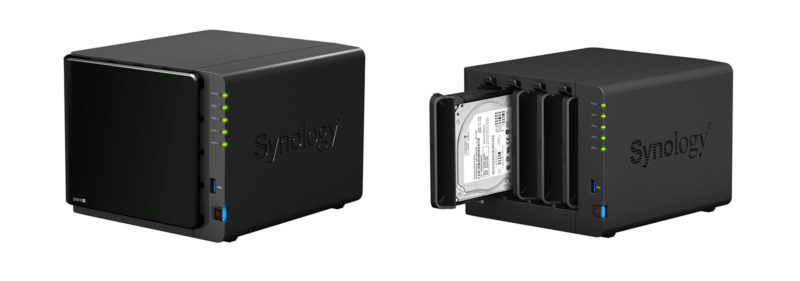
Jean Galea

Health, Wealth, Relationships, Wisdom

  • Start Here
  • Guides
    • Beginner?s Guide to Investing
    • Cryptocurrencies
    • Stocks
    • P2P Lending
    • Real Estate
    • Forex
    • CFD Trading
    • Start and Monetize a Blog
  • My Story
  • Blog
    • Cryptoassets
    • P2P Lending
    • Real estate
  • Consultancy
    • Consult with Jean
    • Consult a Lawyer on Taxation and Corporate Setups
  • Podcast
  • Search

How to Migrate from Zoho Mail to Gmail

Last updated: April 27, 201910 Comments

choosing-perfect-email-address

I recently decided to migrate one of my brands’ email accounts from Zoho Mail to Gmail. Google Apps has many more features than just Gmail and we were also having some spam issues with Zoho Mail so the move was a no-brainer really.

The only disadvantage is that Gmail is not free for business use with your own domain, but the price is worth paying, especially if you don’t require a large number of mailboxes/users.

In any case, my biggest headache was how to replicate the same mailboxes I had on Zoho Mail and move the thousands of emails from Zoho to Gmail. At first, I looked at export/import facilities in both services, however, it turned out that the solution is much simpler.

The best way to migrate is to install a mail package on your laptop, in my case I used the free Thunderbird. There are many others, take your pick or use whatever you have installed already.

Secondly, set up the Zoho Mail inboxes on Thunderbird with an IMAP connection. You also need to create the inboxes in Gmail and enable IMAP (it’s off by default). Then, also set up the Gmail accounts in Thunderbird. Once they can all connect it’s time to work the magic.

Let’s say I have a Zoho Mail inbox named [email protected] and I have set up the same one on Gmail entitled [email protected]. Once they are both able to connect from Thunderbird, what I do is access the Zoho Mail inbox, select all emails, then drag and drop into the same inbox on Gmail. That way the emails will be moved from Zoho Mail’s inbox to the Gmail one. That’s it, easy as pie.

Once you transfer all the emails in this manner, you will also need to set up folders (labels in Gmail) and filters. I suggest you set up the filters within Gmail itself rather than your email client on the laptop. That way you can switch clients at a later stage without having to set up the filters again. Gmail also has a great filtering system so there is no reason to use anything else.

It’s really easy to migrate from one email host to another using IMAP connections. The same procedure described above can, in fact, be used to migrate between any two email hosts that support IMAP.

If you want to keep using free Gmail and still want to use your domain name in your email, you can use the Improv.mx forwarding service.

Filed under: Tech

iCloud Explained

Published: September 05, 20162 Comments

iCloud

Today I sat down for what I hoped would be a quick session of understanding how best to backup our family’s iPhones in a reliable manner. I then proceeded in spending a day trying to understand the utterly confusing world of Apple’s iCloud.

If you are in the same situation, I hope to spare you a few hours through this attempt at explaining the iCloud mess.

We need to consider a few important terms that will help us understand what we can do with iCloud:

  • iCloud Storage,
  • iCloud Drive,
  • iCloud Backup,
  • iCloud Photo Library,
  • My Photo Stream.

No wonder people get confused when trying to understand iCloud! Let’s tackle them one by one.

iCloud Storage

iCloud gives you 5GB of storage for free.

You can upgrade your storage to 50GB, 200GB, or 1TB for a reasonable cost.

Once your iCloud Storage is full, your iPhone will stop backing up to iCloud until you purchase additional storage space or free up storage space in iCloud.

iCloud Backup

iCloud Backup is available on iPhones, iPads and iPods. It serves to back up your entire device (or just some aspects of it, depending on your choices) to iCloud.

iCloud Backups count against your available iCloud Storage.

iCloud Drive

Think of this as a sort of Dropbox or Google Drive, however without having direct access to your files through Finder as you would with Dropbox and Google Drive. It allows apps on Macs, iPhones, and iPads to synchronize files using iCloud. So for example, if you create a note on your iPhone and your MacBook is also connected to the internet, that note will also appear on your MacBook a few seconds later.

Your files in iCloud Drive also count against your available iCloud Storage.

iCloud Photo Library

iCloud Photo Library uploads and stores all of your photos and videos in iCloud so you can access them from all your devices.

There are some important differences between iCloud Photo Library and iCloud backup that you should understand before we move on.

iCloud Photo Library: all your devices can access and view individual photos that are stored in the library.

iCloud Backup: you can’t see individual files or photos in your iCloud Backup, even if photos are part of the backup. iCloud Backups are one big file that restores your entire iPhone – there’s no way to access individual files.

If you’re using iCloud Photo Library and iCloud Backup, you could be paying to back up the same photos twice: Once in your iCloud Photo Library, once in your iCloud Backup.

iCloud Photo Library works like the previously mentioned features of iCloud in that that the contents of the photo library count against your available iCloud Storage.

My Photo Stream

My Photo Stream uploads all your new photos and sends them to all your devices. Sounds kind of like iCloud Photo Library, right? But there’s a little difference:

Photos in My Photo Stream do not count against your available iCloud Storage.

iCloud Photo Library permanently uploads and stores your photos and videos in iCloud. My Photo Stream uploads your photos to iCloud so they’re automatically downloaded on devices with My Photo Stream turned on. It only works over Wi-Fi and doesn’t fill up your iCloud Storage space.

The Photo Library is usually the element that takes up most of the storage space in iCloud. 

If you want to keep backups of your iPhone photos and videos without running out of storage space on iCloud (the free 5GB), I suggest you use the following strategy:

  1. Turn Off Photo Library As Part Of iCloud Backup
  2. Turn Off iCloud Photo Library
  3. Turn On My Photo Stream on your iPhone and iPad
  4. Turn On My Photo Stream on your Mac or PC

Since My Photo Stream does not count against your available iCloud storage you will not have any problems with space utilisation in your iCloud account. The photos will be transferred to your Mac where you can then include them in your cloud or Time Capsule backups.

Filed under: Tech

1Password – My Favorite Password Manager

Last updated: February 12, 20232 Comments

1PasswordUpdate October 2019 – Switching to 1Password Subscription

I’ve since switched to the subscription version of 1Password as it is more convenient to make sure everything works well in sync and eliminates the need for Dropbox. It is also much easier to make sure everyone in my family and business has an updated version of 1Password.

It’s important to note that local backups of vaults can still be made even if you’re using the subscription version. If you back up your computer with Time Machine or Backblaze, you’d automatically have a backup of your vaults. With a subscription you still have a local copy of all your data on your device itself. The subscription gives you a backup with 1Password (the company) as well as a way of syncing your data. If something happened to their servers you’d still have a backup of your data on every device where you use 1Password. If you have that device backed up with Time Machine, Backblaze, etc, your data is backed up in triplicate at least (a copy on the 1P server, a copy on every device, copy in your Time Machine).

One thing that should be of concern is where the data is kept and how it’s being secured. It’s completely rational and prudent to be concerned about where you keep your data and with whom you trust to keep it safe. With either option of using Dropbox or 1Password account, your data is hosted in the cloud. In both cases, it’s stored fully encrypted and decrypted locally on your devices when you access your data. By using Dropbox, you are entrusting 1Password to encrypt your data, and entrusting Dropbox to keep it secure. If you migrate to a 1Password account, you remove Dropbox from the equation. This has the effect of of simplifying things considerably, but it still keeps your data secure.

1Password accounts add some extra layers in addition to your Master Password in order to protect your data, which replaces the security that you are currently relying on Dropbox for. The first is the Secret Key, which is generated locally on your device, not known to us or anyone else, never transmitted over the internet, and combined with your Master Password to unlock the encryption keys that protect your data. The second is Secure Remote Password, a zero-knowledge protocol that adds an additional layer of encryption in transit, and authenticates you with the 1Password servers without using your Master Password or Secret Key in order to sync your data to all your devices. So your Master Password protects your data on your device as it always has, your Secret Key protects your data in the cloud, and Secure Remote Password protects your data in transit.

In terms of control over your data, you will always have that with a 1Password account. The data that you have in Dropbox right now will stay as is until you decide to remove it, so you can certainly just pick up right from where you left off, if you choose. Even better though, if you decided to go back to the standalone license model or move to another provider, the data in your 1Password account remains accessible even after you end your subscription, so you can keep anything that you changed in the meantime.


Having logins to more than 500 websites and having to remember them all is no joke, you’d need some superhuman abilities for that. It’s one of those areas where I had to call on some software to help me out.

I started off using LastPass, and it served me well for a number of years. I was using it mostly as an individual on one laptop, but as my business grew I felt the need to share some of the logins with others. Obviously I don’t want to share all my logins so I needed software that allows easy organisation and sharing. Unfortunately LastPass, while having these features, has a really terrible UI. It has no native app for Mac OS, so I was stuck in their browser app which was painfully slow. I wasn’t going to be able to organize those 500+ logins anytime soon with LastPass.

Enter 1Password, an app with a really sleek UI that works perfectly for me. It stores its password vault locally on your laptop and if you need to use it from more than one device you can sync via Dropbox, which is ideal for me as I’m already a heavy Dropbox user. Now I can easily access my login data from my Macbook Air as well as the iPad. My wife can also access some of my logins through a shared vault. You can create many vaults in fact, and share only those you want. Within each vault, you can further categorize and tag logins, which gives me the right amount of organizational functionality that I need.

One great advantage of 1Password is two-factor authentication. Security-wise, the most important thing is to set a very secure Master password, as that is your weakest point when using 1Password. The password vault is stored on your Mac with 256-bit AES encryption, a standard used by financial institutions. Thus even if a thief steals your laptop or maybe your iOS device, unless the device still has 1Password in logged-in mode, they cannot access your passwords, since the vault is encrypted.

[Read more…]

Filed under: Tech

How to Hide and Protect Private Files/Folders on Mac

Last updated: October 16, 2018Leave a Comment

Hide files and folders on mac

We all have private content stored on our laptops or external drives. Would you like that content to fall into the wrong hands? I sure don’t want that to happen, so I hide and protect my private files and folders.

Hiding Files and Folders

There are two main methods of hiding files and folders in MacOS.

[Read more…]

Filed under: Tech

Using Evernote to Organise and De-Clutter My Life

Last updated: March 09, 2022Leave a Comment

evernote

I love reading about all sorts of topics and a good chunk of my life is spent online.

Logically I’m thus processing a ton of information, and unfortunately, my brain doesn’t always absorb all the information I feed it. Hence I needed some software to help me store all the important tidbits such as links, checklists, receipts, documents etc. The list goes on and on.

[Read more…]

Filed under: Tech

  • « Previous Page
  • 1
  • …
  • 7
  • 8
  • 9

Latest Padel Match

Jean Galea

Investor | Dad | Global Citizen | Athlete

Follow @jeangalea

  • My Padel Experience
  • Affiliate Disclaimer
  • Cookies
  • Contact

Copyright © 2006 - 2025 · Hosted at Kinsta · Built on the Genesis Framework