Jean Galea

Health, Wealth, Relationships, Wisdom

  • Start Here
  • Guides
    • Beginner?s Guide to Investing
    • Cryptocurrencies
    • Stocks
    • P2P Lending
    • Real Estate
    • Forex
    • CFD Trading
    • Start and Monetize a Blog
  • My Story
  • Blog
    • Cryptoassets
    • P2P Lending
    • Real estate
  • Consultancy
    • Consult with Jean
    • Consult a Lawyer on Taxation and Corporate Setups
  • Podcast
  • Search

How to Brew Cold Brew Coffee with the Hario Mitsudashi

Published: August 27, 2025Leave a Comment

The Hario Mitsudashi Cold Brew Coffee Pot is a simple, reliable way to make smooth cold brew at home. This guide uses the 1-liter pot and includes exact grind guidance for the 1Zpresso K-Max Ultra, storage best practices, and why an optional paper filter can improve clarity and shelf life.

What You Need

  • Hario Mitsudashi 1L cold brew pot
  • Freshly roasted coffee, medium-coarse grind
  • Filtered water
  • Kitchen scale (recommended)

Ratio

Start here and adjust to taste:

  • 80–100 g coffee
  • 1,000 ml water

80 g = lighter, tea-like. 100 g = stronger, more concentrated.

Grind Size for 1Zpresso K-Max Ultra

Target a medium-coarse grind, similar to French press. On the 1Zpresso K-Max Ultra, use the 9-10 setting. This is essentially one full turn and one extra notch if needed. This yields a coarse, even grind that avoids muddiness while extracting well during an 8–12 hour steep.

Tuning: If the brew tastes dull or weak, go slightly finer or increase coffee dose. If it’s bitter or muddy, go coarser or reduce steep time.

Step-by-Step

  1. Grind. Weigh 80–100 g beans. Grind at ~50–60 clicks on the K-Max Ultra.
  2. Load. Insert the Mitsudashi mesh basket and add the grounds. Level with a gentle tap.
  3. Saturate. Pour ~200 ml water over the grounds to wet everything evenly. Wait 1 minute.
  4. Top up. Add water to reach 1,000 ml. Optional: gently stir inside the basket for a stronger extraction.
  5. Steep cold. Lid on. Refrigerate 8–12 hours.
    Less time = lighter. More time = richer.
  6. Remove basket. Lift out the filter and let it drip a few seconds back into the pot.
  7. Optional polish. For maximum clarity, pass the brew through a paper filter (details below).

Storage: Keep It Fresh

  • Transfer immediately to a hermetic glass bottle (swing-top or airtight carafe). This limits oxygen exposure and flavor drift.
  • Store in the fridge at 4 °C. Best within 3 days. Acceptable up to ~5 days if kept airtight and cold.
  • Minimize headspace. Fill bottles close to the neck or split into smaller bottles.

Why hermetic? Oxygen drives staling. Airtight storage slows oxidation, preserves aromatics, and maintains sweetness.

Why Add a Paper Filter Pass

The mesh basket leaves fines and oils in suspension. A quick pass through a paper filter after steeping:

  • Increases clarity by removing fines for a crisper, cleaner cup.
  • Reduces bitterness at the tail by absorbing some oils and ultrafines.
  • Improves stability slightly. Fewer suspended particles and oils can slow flavor degradation in the fridge.

If you prefer a heavier body and more “coffee presence,” skip the paper step.

Bean and Roast Guidance

  • Single origin for fruit and florals. Blends for chocolate and nuts.
  • Medium roast is the safe default. Dark roasts can feel heavy in cold brew; go coarser or shorten steep if using them.

Fast Troubleshooting

  • Too weak: finer grind, longer steep, or +10 g dose.
  • Too bitter/muddy: coarser grind, shorter steep, or −10 g dose.
  • Flat by day 2–3: ensure hermetic storage, reduce headspace, consider paper filtering.

Filed under: Health & Fitness

The Bright Side of Sunlight: How to Enjoy the Sun Safely Every Day

Published: June 07, 2025Leave a Comment

sunbathing sun exposureSunlight often gets a bad rap due to skin cancer warnings and anti-aging concerns, but when used wisely, daily sun exposure is one of the most natural, powerful health boosters available to us. If you’ve been avoiding the sun out of fear, it’s time to rethink your approach. Here’s how to safely enjoy the sun and reap its many benefits without risking your health.


Why Daily Sun Exposure Is Good for You

1. Vitamin D Production

Sunlight, specifically UVB rays, triggers vitamin D3 synthesis in the skin. Vitamin D is essential for:

  • Supporting immune function
  • Strengthening bones
  • Regulating hormones
  • Enhancing mood and energy levels

Just 10–20 minutes of direct sun exposure on bare skin (arms, legs, or torso) without sunscreen is often enough for most people, depending on skin tone, time of year, and time of day.

Personally, I have light brown skin and was born in Malta, where the sun is strong and ever-present. My skin handles sun exposure fairly well, so I aim for about 15–20 minutes of morning or late-afternoon sun on arms and legs, usually while out for a walk or doing light activity. I also occasionally sunbathe semi-nude (just covering the private parts – it’s a common thing in Spain), exposing my torso and buttocks — which provides an even more effective way to stimulate vitamin D synthesis across a larger surface area of skin. As long as the exposure is kept short and well-timed (early or late in the day), this can be done safely and healthily.

2. Improved Mood and Sleep

Morning sunlight exposure helps regulate your circadian rhythm by influencing melatonin production. This:

  • Improves sleep quality
  • Reduces symptoms of depression
  • Boosts mental clarity
  • Aligns your internal body clock

3. Heart and Metabolic Health

Moderate sun exposure has been linked to:

  • Lower blood pressure via nitric oxide release in the skin
  • Better blood sugar regulation
  • Healthier cholesterol profiles

When Sunlight Becomes Risky

As with anything, balance is key. Too much sun can result in:

  • Skin damage: premature aging, sun spots, and increased cancer risk
  • Sunburn: especially in fair skin or under intense midday sun
  • Eye strain: long-term UV exposure can harm your eyes
  • Dehydration: especially if exercising outdoors in direct sunlight

How to Get the Benefits Without the Burn

Strategy Benefit
Expose skin gradually Builds tolerance, reduces burn risk
Aim for morning or late afternoon sun Gentler UV, optimal for circadian rhythm
Start with 5–15 minutes a day Ideal for vitamin D without damage
Protect face and neck These areas are more sensitive and often get overexposed
Hydrate before and after Supports detox and cellular function
Use sunscreen if out longer than 20–30 minutes Helps prevent cumulative damage

In my routine, I use ISDIN sunscreen on my face and neck whenever I expect to be outside for longer than 15–20 minutes — even in the late afternoon. It’s lightweight, effective, and doesn’t irritate my skin. I usually apply it after cleansing and before stepping outside.


Pre- and Post-Sun Skincare and Hydration

Before sun exposure:

  • Cleanse the face and apply a light, hydrating layer (like hyaluronic acid or a gentle moisturizer)
  • Apply ISDIN sunscreen to face and neck
  • Drink a glass of water with trace minerals

After sun exposure:

  • Rehydrate with water or herbal tea
  • Apply a soothing cream with aloe vera or panthenol if needed
  • Rinse face and reapply a light moisturizer if you’ve sweated

What’s Ideal for Most People?

If you live in a sunny climate (like Spain or Malta) and have moderate to fair skin:

  • Try 5–20 minutes of sun exposure daily on bare arms and legs
  • Prioritize morning sun (before 11am) or late afternoon (after 5pm)
  • Use a wide-brimmed hat or sunglasses if staying out longer
  • Consider supplementing with vitamin D during winter or if lab tests show you’re deficient

My Supplementation Routine

To support my skin, immune system, and overall wellness (especially with sun exposure), I take the following daily:

  • Vitamin D3 + K2: Maintains healthy levels, especially with less sun
  • Omega-3: Anti-inflammatory and supports skin elasticity
  • Vitamin C: Boosts collagen production and skin resilience
  • Zinc: Aids in skin repair and immune function
  • Trace minerals: Added to water before or after sun time

This combination helps me recover better from sun exposure, avoid dehydration, and keep my skin barrier strong.


Final Thoughts

The sun is not your enemy—in fact, it’s a vital source of life and health when approached with respect. Daily, mindful sun exposure can support immunity, improve sleep, elevate mood, and contribute to long-term well-being.

So go ahead: step into the light—just do it wisely.

Filed under: Health & Fitness

Why I Love Cold Water Immersion

Published: October 24, 2024Leave a Comment

cold water immersionOne of my favourite activities at my fitness club is cold water immersion. I willingly submerge my body into a pool of 12-degree water, embracing the cold that offers both a mental and physical reboot.

Cold water immersion (CWI), a practice I’ve woven into the fabric of my daily routine, isn’t merely a challenging physical activity but an avenue to tap into unseen mental and physiological realms.

The Science Behind Cold Water Immersion

The science on CWI is not really conclusive, so we have to be honest about that point. There are many people, including personalities like Wim Hof, who make it sound like a holy grail. In my opinion, it’s not. It’s just one more activity that can help maintain a state of well-being.

Here’s what science does tell us about cold water immersion:

  • Physical Effects on the Body: When your body hits the cold, it triggers vasoconstriction, diverting blood to vital organs and engaging the metabolic systems in a unique dance to preserve warmth. It’s a natural, physiological response that bolsters circulatory efficiency.
  • Psychological and Neurological Effects: The initial shock gives way to a surprising calmness. Research indicates that CWI can enhance mood and reduce stress by activating the sympathetic nervous system and releasing endorphins.
  • Immune System and Recovery: Science suggests that regular CWI can positively influence the immune system and reduce muscle inflammation, aiding in quicker recovery post-physical exertion.

Duration and Immersion Recommendations

How Long Should You Stay In? The recommended time for cold water immersion can vary depending on experience and tolerance levels. For beginners, starting with 1-2 minutes is ideal. As you become more comfortable, you can gradually extend your time to around 5-10 minutes. However, it’s important not to push beyond your limits. Research suggests that 11-15 minutes per week, split across multiple sessions, can be sufficient to gain the desired physiological benefits without overexposure to cold stress.

Which Parts of the Body to Submerge? To achieve the full benefits of CWI, it is generally recommended to submerge as much of the body as possible, ideally up to the neck. This ensures the core, which houses the majority of vital organs, experiences the effects of the cold. However, even partial immersion (such as submerging just the legs or arms) can provide benefits for circulation and inflammation reduction. Hands and feet are often the most sensitive, so you might find it easier to keep them out initially until you build tolerance.

Submerging the head in cold water immersion can have additional effects, both positive and negative. On the positive side, dunking your head can activate the mammalian dive reflex, which helps lower heart rate and conserve oxygen, potentially enhancing relaxation. However, sudden head immersion also carries risks, particularly for individuals who are not used to it. The rapid cooling of the head can lead to a sudden spike in blood pressure or even cause lightheadedness or fainting.

If you decide to submerge your head, it’s best to do so gradually. Start by wetting your face and the back of your neck before slowly dunking your head. This can help your body adjust more comfortably and safely to the extreme temperature. As always, listen to your body and don’t push beyond what feels safe.

It’s also quite common for men to experience discomfort in the groin area, particularly in the testicles. This discomfort happens because the body instinctively attempts to protect reproductive organs from the extreme cold by drawing them closer to the body, leading to a tightening sensation and sometimes pain. If the discomfort is too much, wearing neoprene shorts can help provide some insulation while still gaining the overall benefits of cold exposure.

My Personal Routine

  1. Preparation: Before I enter the pool, I ensure mental alignment with the impending cold and adhere to safety, ensuring I’m well-rested and not alone during the process.
  2. Execution: Slow and deliberate, I enter the water, focusing on maintaining controlled, steady breathing to counter the initial shock and gradually immerse my entire body.
  3. Post-Immersion Process: Post-immersion, I gently warm my body and focus on replenishing it with nutritious food, while also dedicating time to reflect on the experience.

Timing matters. When incorporating CWI into a fitness routine, it’s crucial to be mindful of when to take the plunge. I practice CWI after my padel matches as an aid to recovery and lower inflammation, but I avoid it after weight lifting sessions, as some research suggests it might not be optimal for muscle growth. CWI right after intense strength training can potentially blunt hypertrophy by limiting the body’s natural inflammatory response needed for muscle repair.

If your goal is to enhance muscle gains, avoid immersing right after lifting sessions. Instead, schedule it on rest days or after cardiovascular activities where inflammation reduction might be more beneficial. For general stress relief and recovery, early mornings or after work can be ideal times to get the mental benefits without conflicting with muscle recovery.

Benefits and Challenges

This daily plunge has fortified not just my physical being but also my mental resilience, offering a consistent space to practice surrender and grit simultaneously.

It was never easy. To this day, cold showers are too difficult for me, but I found that the plunge is something I can do consistently. Having said that, the initial fear and physical discomfort were barriers that required persistent and mindful efforts to overcome. If you feel the same, know that it’s absolutely normal. If you never manage to get accustomed to cold water immersion, that’s also OK; it’s not essential to your well-being—just find something else that works for you.

Conclusion

My journey with CWI has been really interesting. I have gained a deep appreciation for the body’s capacity to adapt and find calm in chaos. It has helped me build up the ability to prepare myself for adverse conditions, rather than constantly be in a responsive mode, changing my moods and level of motivation as a reaction to outside factors. While my experiences are personal and subjective, the underlying theme of embarking on a journey of self-discovery through pushing physical and mental boundaries is universally relevant.

Ultimately, cold water immersion is about more than just braving the cold—it’s a tool for resilience, mental clarity, and adaptation. If you’re curious, start small, and listen to your body as you progress. It’s not about following a fad but finding what adds value to your well-being.

Filed under: Health & Fitness

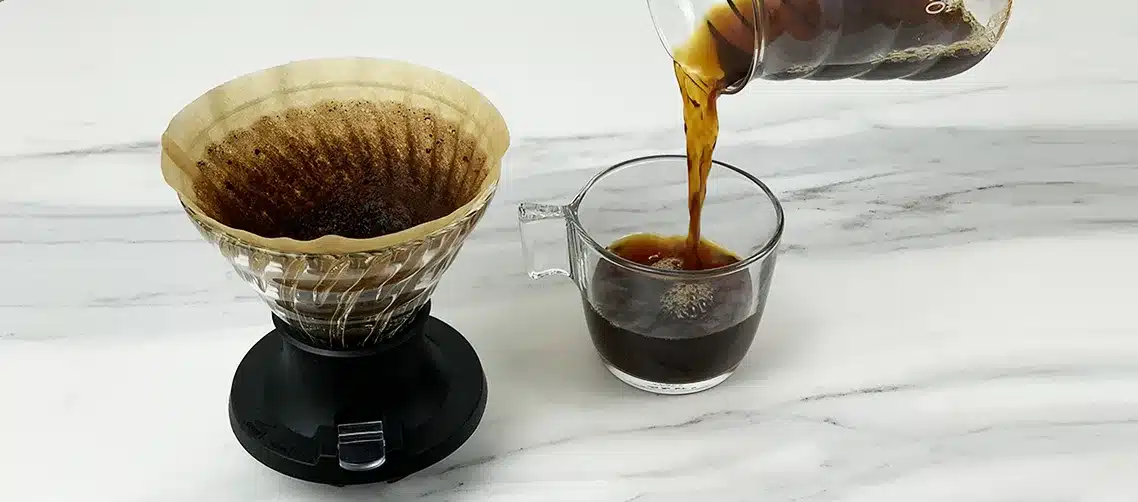
Brewing the Perfect Cup with the Hario Switch

Last updated: October 22, 2024Leave a Comment

hario switch recipe

The Hario Immersion Dripper Switch is a remarkable tool for any coffee aficionado looking to elevate their home brewing experience. Crafted with precision in Japan, this device combines the best of immersion and pour-over brewing methods to give you control over the extraction process and, consequently, over the flavor profile of your coffee.

Here’s a detailed guide to help you brew the perfect cup every time.

What you’ll need

  • Hario Switch
  • Jug/recipient/server
  • Paper filter
  • Freshly ground coffee
  • Hot water

I use Cafec paper filters for the V60 and Switch. They produce better results than Hario’s filters. But if they’re not available in your area, then Hario’s V60 filters (size 02 is the most commonly used) will work fine as well. They sell two variants, natural and bleached. Most people prefer the bleached ones as they have a more neutral and less papery taste. But it’s worth trying both and seeing what you like best.

As for grinding the coffee, I use a 1Zpresso K-Max grinder which makes child’s play out of grinding beans for 1 or 2 cups. The grind size I use for the Hario Switch is 6.5, with slight variations up or down depending on experiments with each batch of coffee I’m trying out.

If you’re regularly grinding beans for the whole family then you might want to invest in a quality electric grinder like the Niche Zero or the Fellow Ode. If you want a budget pick I’d recommend the Baratza Encore which does a good job, especially if you won’t need to grind beans for an espresso machine, in which case I’d strongly recommend the other picks.

An essential trick is to spray the beans with water before putting them through the grinder (whether it’s manual or electric doesn’t matter here). It will almost completely eliminate any static and thus prevent the ground coffee beans from sticking to the insides of the grinder or the recipient. Seriously, if you’re having that problem, try this hack, it’s a game-changer. I am using a Muji 50ml spray bottle for this purpose.

Ok, Ensure all parts are clean and ready to use. Let’s get cracking.

Step 1: Prepare Your Dripper

Place a paper filter into the dripper. Pre-fold the crimped edge and fit it snugly against the walls. Make sure the switch is in the open position. Rinse the filter with hot water to remove any paper taste and warm the server. Dispose of the rinsing water before moving to the next step.

Step 2: Add Coffee, Bloom and Brew

  1. First Pour (50% of Water):
    • Add your ground coffee to the brewer and tare the scale.
    • Start the timer and pour 50% of your total water amount (160ml of water).
    • Keep the switch open during this pour.
    • Start pouring in the center and circle towards the outer edge before circling back to the center. This pour extracts brightness and fruitiness.
  2. Second Pour (Remaining 50% of Water):
    • At 45 seconds, close the switch to stop the flow.
    • Pour the remaining 50% of water, following the same circular motion to ensure all grounds are agitated and fully involved in the brewing process.
    • Allow the coffee to steep for a total of 2 minutes.
  3. Open the Valve and Draw Down:
    • After the steep time, press the switch again to open the valve, allowing the coffee to draw down. The drawdown should take 30 seconds to a minute, depending on the batch size. Observe the coffee stream; it should be steady and even. If the coffee drips too quickly, consider a finer grind next time. If it drips too slow, go coarser.

Notes on Ratio and Adjustments:

  • A 1:15 coffee-to-water ratio is a good starting point, especially for entry-level grinders.
  • Adjust the ratio based on your grinder quality: 1:16 or 1:17 if you have a more advanced grinder.
  • The recipe is flexible; adjust the grind size and ratios to fit your taste and bean type.

Final Cup Profile:

  • This method results in a cup that combines the acidity and sparkling flavors typical of pour-over, with the fuller body that comes from immersion brewing, making it an excellent everyday brew.

Alternative Method:

Pour 240ml of hot water (ideally at about 93°C/200°F) over the coffee grounds to fully saturate them. Start your timer. After pouring, give the coffee a gentle stir to ensure all grounds are wet. Allow the coffee to bloom for 30 seconds. This step is crucial as it allows the coffee to de-gas, leading to a better extraction. After the bloom, pour in the remaining water and place the switch in the closed position. Let the coffee steep for an additional 1.5 to 2 minutes, depending on your taste preference.

Pro Tips for the Perfect Brew:

  • Always use freshly roasted beans and grind them just before brewing.
  • Adjust the brewing time to suit your taste. Longer brews extract more, leading to a stronger flavor, while shorter brews yield a lighter cup.
  • Maintain consistent water temperature throughout the brewing process.
  • Experiment with different coffee-to-water ratios to find your ideal strength.
  • Remember, making coffee is an art form. Each step in the process can be tweaked to create a cup that’s perfect for you. The Hario Immersion Dripper Switch is your canvas, and with practice, you’ll be painting flavor masterpieces in no time.

A Note on Cleaning

All parts of the Switch can be removed for cleaning. They are heat resistant (Switch 100ºC, Server 120ºC, Silicone base 180ºC and Bowl 120ºC).

Filed under: Health & Fitness

My Camping Guide

Last updated: October 22, 2024Leave a Comment

To find camping grounds in Spain I use:

Campings Luxury

This site offers a range of luxurious camping options, including glamping and high-end facilities. It’s perfect for those looking for comfort and a bit of luxury in nature.

Pitchup

Pitchup is a comprehensive resource for finding a wide variety of camping options. From basic sites to fully equipped ones, this platform helps you filter by amenities, location, and more.

Yellohvillage

This network of camping villages across Europe includes many sites in Spain. They offer well-maintained facilities, family-friendly environments, and various accommodation options.

Ideally find camping sites where dogs are not allowed, as they are a significant nuisance. Here’s an example of one that bans dogs and emphasises peace and tranquility: Bedurapark.

Motorhome Rentals

The best company I’ve found for motorhome rentals in Barcelona is Amafi.

My favorite camping equipment

NatureHike Mongar 2

A lightweight tent that I use when solo camping. Ideal for bike camping or car camping.

NatureHike Cape 8P Instant Tent

Ideal for the whole family when car camping.

Sleeping Mats/Pads

The Thermarest Mondoking 3D will give you an experience close to sleeping on your bed at home. I use the OutdoorMaster Cachalot 2S pump to get it inflated and deflated.

Pillows

The Klymit Drift pillow has an ingenious design and is extremely comfortable irrespective of your sleep style.

Others to consider are the Klymit Luxe, Nemo Fillo and the Teton Sports Camp Pillow.

Sleeping Bag Liners

I use a FitFlip microfiber bag liner. This can be used in summer if a sleeping bag is too hot. It’s also a great idea if you’re on experiences like Camino de Santiago were some hostels only provide a bed but no sheets.


Filed under: Health & Fitness

  • 1
  • 2
  • 3
  • …
  • 7
  • Next Page »

Latest Padel Match

Jean Galea

Investor | Dad | Global Citizen | Athlete

Follow @jeangalea

  • My Padel Experience
  • Affiliate Disclaimer
  • Cookies
  • Contact

Copyright © 2006 - 2025 · Hosted at Kinsta · Built on the Genesis Framework