Jean Galea

Health, Wealth, Relationships, Wisdom

  • Start Here
  • Guides
    • Beginner?s Guide to Investing
    • Cryptocurrencies
    • Stocks
    • P2P Lending
    • Real Estate
    • Forex
    • CFD Trading
    • Start and Monetize a Blog
  • My Story
  • Blog
    • Cryptoassets
    • P2P Lending
    • Real estate
  • Consultancy
    • Consult with Jean
    • Consult a Lawyer on Taxation and Corporate Setups
    • AI Consultancy for Business
  • Podcast
  • Search

Heat and Cold Treatment for Padel Sprains and Injuries

Published: June 19, 20181 Comment

Applying ice or heat can provide relief from injuries, aches, and pains, but they shouldn’t be used interchangeably. Generally speaking, ice works well after a sudden injury while heat helps to soothe ongoing muscle aches and pains.

Cold

Cold works for injuries because it narrows your blood vessels, which helps prevent blood from accumulating at the site of injury, which will add to inflammation and swelling while delaying healing. This is also why elevation is helpful; it limits blood flow to the area to minimize swelling.

During immediate treatment, the aim is to limit the body’s response to injury. Ice will:

  • Reduce bleeding into the tissues.
  • Prevent or reduce swelling (inflammation).
  • Reduce muscle pain and spasm.
  • Reduce pain by numbing the area and by limiting the effects of swelling.
  • These effects all help to prevent the area from becoming stiff, by reducing excess tissue fluid that gathers as a result of injury and inflammation.

A good rule of thumb to remember following an injury is RICE: rest, ice, compression, and elevation.

Ideally, ice should be applied within 5-10 minutes of injury and for 20-30 minutes. You don’t want to use ice longer than this as it could damage your skin or even lead to frostbite. This can be repeated every 2-3 hours or so whilst you are awake for the next 24-48 hours. You’ll want to protect your skin from direct exposure by applying a cloth or towel between your skin and the ice.

Do not use ice packs on the left shoulder if you have a heart condition. Do not use ice packs around the front or side of the neck.

After the first 48 hours, when bleeding should have stopped, the aim of treatment changes from restricting bleeding and swelling to getting the tissues remobilized with exercise and stretching. Ice helps with pain relief and relaxation of muscle tissue.

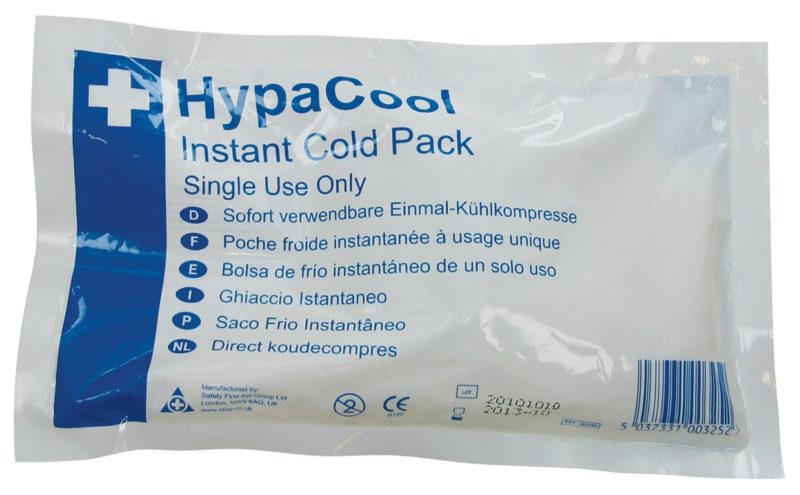
I bought an ice pocket from Decathlon, and keep ice cubes handy in the freezer to use whenever needed. You can take such bags with you when you play in tournaments, typically the bar at the courts will have some ice if you need to apply cold to a sprain.

I also always take a bag of instant ice with me wherever I play. This guarantees that I will always have ice treatment available whenever I need it.

[Read more…]

Filed under: Padel

How to Back Up Your Gmail in 2026

Last updated: March 10, 202618 Comments

Gmail stores years of your life — receipts, contracts, medical records, conversations you’d hate to lose. Google can and does lock accounts, sometimes with no warning and no clear appeal process. Accidental deletions happen. And relying entirely on a cloud service you don’t control is just poor data hygiene.

A local backup of your Gmail solves all of this. This guide covers three practical approaches: a manual export using Google’s own tools, an automated open-source backup tool, and a technical IMAP-based method for maximum control. There’s also a note for Synology NAS owners.

Note: This post originally covered GMVault, which was a solid tool in its day. GMVault requires Python 2.7, which reached end-of-life in January 2020, and the project has not been meaningfully updated since. The OAuth2 flow it relies on is effectively broken. Everything in this updated guide uses tools that are actively maintained and work with Google’s current APIs.

Option 1: Google Takeout (No Setup, Manual)

Google Takeout is Google’s official data export tool. It lets you download your entire Gmail mailbox as one or more MBOX files — a standard format that most email clients can open.

This is the right choice if you want a one-off snapshot of your inbox or if you’re not comfortable with the command line.

How to export your Gmail via Takeout

  1. Go to takeout.google.com and sign in.
  2. Click Deselect all, then scroll down and check only Mail.
  3. Click All Mail data included if you want to export specific labels rather than everything.
  4. Click Next step, choose your preferred file type (ZIP), and set a maximum file size (2 GB is a safe default — Google will split the archive automatically if your mailbox exceeds it).
  5. Click Create export. Google will email you a download link when it’s ready.

Depending on the size of your mailbox, this can take anywhere from a few hours to several days. The download link is only valid for 7 days, so don’t let it expire. Google also limits you to three export attempts per day.

Limitations

Takeout is not incremental — every export is a full download of your entire mailbox. If your Gmail is 40 GB, you’re downloading 40 GB every time. There’s no built-in way to automate it on a schedule. It’s a snapshot, not a continuous backup strategy.

MBOX files can also be unwieldy. Apple Mail, Thunderbird, and most Linux mail clients handle them fine. If you just want to view emails, Thunderbird with the ImportExportTools NG add-on is your best bet for browsing a local MBOX archive.

Option 2: Got Your Back (Best Automated Option)

Got Your Back (GYB) is an open-source command-line tool maintained by the GAM-team on GitHub. It connects to Gmail via the official Gmail API using OAuth2, pulls down your email, and stores it locally. It supports full and incremental backups, making it genuinely useful as an ongoing backup solution rather than a one-off tool.

This is the best modern replacement for GMVault.

Installing GYB

GYB ships as a standalone binary — no Python environment to configure. Download the latest release for your platform from the GitHub releases page.

On macOS, move the binary somewhere on your PATH:

sudo mv gyb /usr/local/bin/
chmod +x /usr/local/bin/gyb

On Linux (including a Synology NAS accessed via SSH), place it in a suitable directory and make it executable the same way.

Authenticating with your Google account

The first time you run a backup, GYB will walk you through OAuth2 authorization. Run this command, replacing the email address with your own:

gyb --email [email protected] --action create-project

This opens a browser window asking you to authorize GYB to access your Gmail. Once you approve, GYB saves a token locally so it can run unattended in the future.

Running your first backup

To do a full backup of your entire mailbox:

gyb --email [email protected] --action backup --local-folder /path/to/backup/folder

The first run downloads everything, which will take a while on a large mailbox. After that, incremental backups only pull new messages:

gyb --email [email protected] --action backup --local-folder /path/to/backup/folder --search "newer_than:1d"

GYB stores emails as individual .eml files organized by Gmail message ID, which makes restoration straightforward.

Restoring from a GYB backup

To restore messages back to a Gmail account:

gyb --email [email protected] --action restore --local-folder /path/to/backup/folder

Automating GYB on macOS or Linux

On a Mac, add a cron job via crontab -e. This example runs a daily incremental backup at 2am:

0 2 * * * /usr/local/bin/gyb --email [email protected] --action backup --local-folder /Volumes/NAS/gmail-backup --search "newer_than:2d" >> /var/log/gyb-backup.log 2>&1

On Linux or a Synology NAS with SSH access enabled, the same cron syntax applies — just adjust the paths.

Running GYB on Synology via Docker

If you want GYB to run directly on your DiskStation rather than from your Mac, the docker-gyb container is the cleanest approach. It handles scheduling internally, running a full backup every Sunday at 1am and incremental backups Monday through Saturday by default.

The authentication step still requires a browser — you’ll need to run it once from a machine with a desktop environment to generate the token file, then copy that token to your NAS for the Docker container to use.

Option 3: IMAP Backup (Most Flexible, Most Technical)

Gmail supports IMAP, which means any tool that speaks IMAP can pull down your mail. This approach is lower-level than GYB — you’re not using the Gmail API, you’re treating Gmail like any other mail server. The tradeoff is more configuration up front, but also fewer API dependencies and maximum portability.

Two tools worth knowing here: mbsync (part of the isync project) and offlineimap. Both are mature, actively maintained, and widely used. mbsync is generally faster and more actively developed; use it unless you have a specific reason for offlineimap.

Prerequisites

Before you can connect via IMAP, you need to do two things in your Google account:

  1. Enable IMAP access. In Gmail, go to Settings → See all settings → Forwarding and POP/IMAP → Enable IMAP.
  2. Create an App Password. Google no longer allows third-party apps to sign in with your main Google password. You need a dedicated App Password. Go to myaccount.google.com/apppasswords, create one (call it “mbsync” or similar), and save the 16-character password it generates. You will only see it once.

Note: App Passwords require 2-Step Verification to be enabled on your Google account.

Installing mbsync

On macOS:

brew install isync

On Debian/Ubuntu:

sudo apt install isync

Configuring mbsync for Gmail

Create a file at ~/.mbsyncrc with the following, replacing the placeholders with your details:

IMAPAccount gmail
Host imap.gmail.com
User [email protected]
Pass YOUR_APP_PASSWORD
SSLType IMAPS
Port 993

IMAPStore gmail-remote
Account gmail

MaildirStore gmail-local
Path ~/mail/gmail/
Inbox ~/mail/gmail/Inbox

Channel gmail
Far :gmail-remote:
Near :gmail-local:
Patterns *
Create Both
Expunge None
SyncState *

Don’t store your App Password in plain text if you can help it. Better approaches include encrypting it with GPG and using a PassCmd directive, or storing it in your system keychain. The Arch Linux wiki page for isync covers this in detail.

Running a sync

mbsync -a

The first sync will take a long time — Google imposes a 2,500 MB daily IMAP download limit, so a large mailbox may take several days to mirror fully. After the initial sync, subsequent runs only pull new messages.

Mail is stored in Maildir format, one file per message. This is extremely portable — virtually every email client on every platform can read Maildir.

Automating mbsync

On macOS, create a LaunchAgent plist or add a crontab entry. On Linux:

0 3 * * * /usr/bin/mbsync -a >> /var/log/mbsync.log 2>&1

A Note on Synology DiskStation

If you own a Synology NAS, you may have come across Active Backup for Google Workspace. This is Synology’s native backup package for Google accounts, and it is license-free. However, there is an important caveat: it is designed for Google Workspace (paid business accounts), not personal @gmail.com accounts. The setup requires domain admin access and a Google service account with domain-wide delegation — none of which apply to personal Gmail.

For personal Gmail on a Synology NAS, your best options are:

  • Run GYB on your Mac and point the backup folder at a mounted NAS share.
  • Run the docker-gyb container directly on your DiskStation using Container Manager.
  • Run mbsync on your Mac and sync the Maildir to the NAS via rsync or a Hyper Backup task.

The docker-gyb approach is the most elegant if you want the backup to run autonomously on the NAS without keeping your Mac on.

Which Method Should You Use?

If you want something simple and don’t need automation, Google Takeout is fine for occasional snapshots. Set a calendar reminder to export every few months.

If you want ongoing automated backups with minimal fuss, Got Your Back (GYB) is the right choice. It’s actively maintained, uses official Google APIs, handles incremental backups, and has a Docker container that makes Synology integration straightforward.

If you want the most control — Maildir format, no Google API dependency, compatibility with any email client — go with mbsync. It takes more initial setup but is extremely reliable once configured.

Any of these is a significant improvement over having no local backup at all.

Filed under: Tech

How P2P Lending and Property Crowdlending is Taxed in Spain

Last updated: March 12, 20265 Comments

Crowdlending is very popular in Spain, and I have written about my experience with property crowdfunding platforms in Spain before. For the purposes of this article, crowdlending and crowdfunding are interchangeable — they are treated the same for tax purposes.

This also covers P2P lending platforms in Europe. As a Spanish resident, all interest income from these platforms is taxed under the same savings income rules described below.

How P2P and Crowdlending Income is Classified

Any interest you earn is declared as rendimientos del capital mobiliario — income from movable capital. This puts it in the same category as interest from bank deposits or dividends from stocks.

A few important rules:

  • You must declare interest even if you never withdrew it from the platform — reinvested returns still count.
  • Income earned in a given year is declared the following year. Interest received in 2025 goes into your 2025 Renta declaration, which you file in April-June 2026.
  • You declare your worldwide income in Spain’s IRPF. Foreign platforms are treated the same as Spanish ones.

Where to Report It in Your Tax Return

In the Modelo 100 (IRPF), interest from P2P and crowdlending platforms goes in casilla 027 — Rendimientos del capital mobiliario a integrar en la base imponible del ahorro. You enter the gross amount before deducting any retenciones or platform fees.

If a foreign platform withholds tax at source (Mintos, for example, withholds 5% for confirmed EU/EEA residents), you declare that withholding separately in casilla 588 as foreign taxes paid, then claim the corresponding double taxation deduction.

Retenciones: What Spanish Platforms Do For You

Most Spanish crowdfunding platforms automatically deduct 19% from your profits and pay it directly to Hacienda. Once you access your Hacienda account, you will see those retenciones pre-populated in your draft declaration.

Foreign platforms generally do not apply any Spanish withholding. That means the income won’t appear in your draft automatically — you have to add it yourself.

The Current Savings Income Tax Bands

P2P lending and crowdlending interest is taxed within Spain’s base imponible del ahorro (savings tax base). The bands as of 2025 are:

  • Up to €6,000: 19%
  • €6,000 to €50,000: 21%
  • €50,000 to €200,000: 23%
  • €200,000 to €300,000: 27%
  • Over €300,000: 30%

The 19% retention applied by Spanish platforms matches the lowest band — which is why it works as a starting-point withholding. If your total savings income exceeds €6,000, you will owe the difference at the applicable higher rate.

Note on recent changes: Spain added the 27% band (€200k–€300k) in 2023, and the top rate above €300,000 increased from 28% to 30% from January 1, 2025, under Ley 7/2024. If you have been using an older version of this article as reference, make sure your tax advisor is working from current figures.

These rates apply across all savings income — P2P interest, bank deposits, dividends, and capital gains from asset sales all stack together in the same base.

Real Estate Crowdfunding: Same Rules, With One Difference

Income from property crowdfunding platforms (like Urbanitae, Civislend, or Housers) is taxed as savings income in the same way as standard crowdlending interest.

The distinction comes from how the platform structures the investment:

  • Crowdlending (debt) projects: Interest paid to you is taxed as rendimientos del capital mobiliario (casilla 027). Withholding applies at 19%.
  • Equity projects: Dividends are also treated as rendimientos del capital mobiliario. If the project ends through a sale of the underlying asset and you receive a liquidation quota, that may be treated as a capital gain (ganancia patrimonial) instead — in which case no automatic withholding occurs and you must report it manually, with the acquisition price and sale price.

If you received income from foreign property crowdfunding platforms, they will normally send you the full amount with no Spanish withholding deducted. You then declare it in your IRPF during the April–June filing window of the following year.

Losses from Defaults

If a loan defaults and you lose principal, you can declare that loss as a pérdida patrimonial in casilla 389. Losses can offset capital gains, and any unused losses carry forward for up to four years.

The catch: losses are only deductible once the debt is formally deemed uncollectible — typically after 12 months or more have passed with no recovery, or when the platform confirms the loan is unrecoverable. Provisional impairments during active recovery processes generally do not qualify.

Withholding Tax on Foreign Platforms (Latvia, Estonia)

Some popular European P2P platforms are based in Latvia (Mintos, TWINO, ViaInvest, Nectaro) or Croatia (PeerBerry, Esketit). Spain has double taxation treaties with both countries.

Under the Spain–Latvia treaty, the general withholding rate on interest is 10%, though a most-favored-nation clause can reduce this further. Mintos currently applies a reduced withholding of 5% for investors who have confirmed their EU/EEA tax residency by providing their Spanish NIF.

If you have not confirmed your tax residency with Mintos, the platform may withhold up to 25.5%. You can request a refund of excess withholding from the Latvian State Revenue Service (VID) if the treaty rate was lower than what was actually deducted.

Whatever withholding a foreign platform has applied, declare it in casilla 588 and claim the double taxation relief — so you are not taxed twice on the same income.

Modelo 720: Do You Need to File?

Modelo 720 is Spain’s annual declaration of assets held abroad, due by March 31 each year for the previous year’s holdings.

For P2P lending, the position has been clarified through a DGT (Dirección General de Tributos) binding ruling: loans you have made to third parties through a platform are generally not required to be declared in Modelo 720, as they are not considered securities or financial accounts. However, there are two situations where you may have an obligation:

  • Uninvested cash sitting in a foreign platform’s account: If this is held in a segregated client account that functions like a bank account, and the total value across all such accounts exceeds €50,000, you may need to declare it.
  • Platform accounts that issue securities or Notes: Some platforms (Mintos restructured its model to issue regulated Notes) may mean your holdings technically qualify as financial instruments — which would bring them into scope.

The rules here are genuinely unclear and evolving. If you hold significant balances in foreign platforms, get a specific opinion from a gestor or tax advisor who is familiar with P2P investing. Do not assume you are either definitely obliged or definitely exempt.

Key Practical Steps Each Year

  1. Download your annual tax statement from each platform — most provide a PDF or CSV summary of interest received and any withholding applied.
  2. Check your draft Renta declaration in April. Spanish platforms should appear automatically; foreign ones almost certainly will not.
  3. Add foreign interest manually to casilla 027 (gross amount) and foreign withholding to casilla 588.
  4. If any loans defaulted and are confirmed uncollectible, add those losses to casilla 389.
  5. Review Modelo 720 obligations by late March if you hold over €50,000 in uninvested cash at foreign platforms.

You can find more information about paying taxes in Spain on this site.

__________________
Please note that I am not an accountant or financial advisor. The above is the result of my own research and may contain inaccuracies. Tax rules change, and individual circumstances vary. Before you submit any tax returns, I strongly recommend consulting a qualified tax advisor or gestor who can review your specific situation.

Filed under: Money, P2P Lending

How to Open a Maltese Personal Bank Account

Last updated: March 11, 2026Leave a Comment

One of the first steps in establishing a life in Malta is opening a bank account. In this article, I’ll walk through the current process, which banks are actually worth considering, and what your real alternatives are if the local banks give you the runaround. Spoiler: that happens more than it should.

Unfortunately, banks in Malta have become excessively stringent in recent years, and many people — especially expats — are finding it difficult or outright impossible to open an account with a local bank. The good news is that the alternatives have gotten genuinely good.

The State of Banking in Malta Right Now

Banking in Malta has always been a source of frustration for expats, and that hasn’t changed. The local banks are slow, bureaucratic, and increasingly paranoid about compliance. That said, the fintech alternatives have gotten genuinely good — which helps offset the pain.

There’s also one major development you need to know about: HSBC Malta is being sold. In December 2025, HSBC Continental Europe signed a definitive agreement to sell its 70.03% stake in HSBC Bank Malta to CrediaBank (a Greek bank, formerly Attica Bank) for €200 million. The deal is pending regulatory approval from the MFSA, the ECB, and the Bank of Greece, with completion expected late 2026 or early 2027. APS Bank was an early bidder but withdrew in April 2025.

For existing HSBC Malta customers, the bank has committed to business continuity for now. But no one really knows what a Greek bank’s stewardship of Malta’s second-largest institution will look like in practice.

Choosing the Right Bank

The main banks operating in Malta are:

  • Bank of Valletta (BOV) — the largest, still state-linked
  • HSBC Malta — being acquired by CrediaBank, pending regulatory approval
  • APS Bank — growing, with a fully online account option
  • Lombard Bank — smaller, more boutique
  • BNF Bank (formerly Banif Bank) — another mid-tier option

Each bank has its own account options, fee structure, and — critically — its own risk appetite when deciding who they’ll actually let in the door.

Required Documentation

Across the board, you’ll need to bring:

  • A valid passport or national ID card (for EU/EEA nationals)
  • Proof of address (utility bill or rental agreement)
  • A reference letter from your current bank or recent bank statements
  • Proof of income or employment (payslip, employment contract, or pension statement)
  • Tax Identification Number (TIN) or Social Security Number if applicable

Some banks will ask for more. Always call ahead and confirm the exact list before showing up, because turning up without one document can mean rescheduling an appointment weeks out.

Opening an Account in Person

Most banks in Malta still require you to open an account in person at a branch. Book an appointment — walk-ins are usually a waste of your time. During the appointment, expect questions about the purpose of the account, where your money comes from, and your expected transaction activity. This is standard AML/KYC procedure, not a personal interrogation — but it does catch people off guard.

Opening an Account Remotely

APS Bank now offers a fully online account (the APS Online Account) for €1/month, denominated in EUR. This is the most accessible route if you want a Maltese bank account without the branch ordeal. Their standard current account (€2/month, includes a debit card) can also be started online before completing formalities in-branch.

For other banks, remote opening is generally limited to people who already have an existing relationship with the institution.

Bank Account Features and Fees

Maltese banks offer the basics — online banking, debit cards, ATM access — but don’t expect a slick modern experience. Be especially attentive to:

  • Monthly maintenance fees (BOV charges €60/year if your residential address is outside Malta)
  • Transaction fees, especially for international transfers
  • ATM fees outside their own network
  • Currency conversion rates, which are typically worse than fintech alternatives

BOV vs HSBC Malta

For years these two were the only real options. Here’s how they stack up based on personal experience with both.

Internet Banking

HSBC has historically offered a cleaner interface and an easier way to reach bank staff when something goes wrong. BOV revamped their internet banking system a few years back and somehow made it worse — and I say that as someone who sent messages through their old portal that never received a reply.

HSBC’s platform remains the more polished of the two — though what happens after the CrediaBank acquisition completes remains to be seen.

Branches

HSBC wins here. Staff tend to be professional, offices are modern, and the process feels efficient when you follow their procedure correctly. BOV branches vary significantly in quality — some are fine, some are a queuing nightmare.

Getting Things Done

HSBC has historically had a reputation for being stricter on requirements than BOV. That said, once you meet their requirements, things actually get done. BOV’s bureaucracy can grind on indefinitely.

Crypto-Friendliness

Neither bank plays well with crypto. BOV blocks outgoing transfers to crypto exchanges, and incoming transfers from exchanges can trigger reviews and blocks. HSBC operates the same way. If crypto transfers are a priority, scroll down to the Agribank section.

ATMs

HSBC ATMs are generally easier to use and better located. No contest here.

Fees

BOV charges €60/year if your registered address is outside Malta — a fee that tends to come as a surprise. HSBC’s fee structure has historically been more transparent at the personal account level.

Which Bank Should You Use?

After holding accounts with both BOV and HSBC for over 20 years, I eventually shut down my BOV account. The internet banking was genuinely painful to use, and every year brought some new hidden charge or unexplained issue I had to chase down. HSBC was always more professional — so I stayed with them.

With the CrediaBank acquisition pending, if you’re opening fresh, APS Bank is worth a serious look as a more stable alternative with online account opening.

My honest recommendation: if you live in Malta, hold at least two accounts — one local and one fintech. The local one gives you direct debit capability and local credibility; the fintech one gives you everything else.

The Fintech Alternative: Revolut and Wise

Revolut has been available in Malta for over a decade, and Wise for nearly as long. Both offer proper EU IBANs, multi-currency accounts, and a user experience that makes the local banks look like they’re stuck in the 1990s.

Wise edges ahead on exchange rates — genuinely important if you work in the UK and convert between GBP and EUR regularly. Revolut wins on everyday features: real-time spending notifications, budgeting tools, and the sheer convenience of having everything in one app.

Both platforms offer features that Maltese banks will likely take years to match: real-time spending notifications, built-in budgeting, instant international transfers, and the ability to link your phone for contactless payments.

For day-to-day banking, especially for expats, this is the practical choice for many people.

Open a Revolut account | Wise account

What About Crypto Transfers?

The big banks won’t touch it — don’t waste your time trying.

Agribank remains the standout option in Malta for individuals who need to transfer to and from crypto exchanges. It’s a smaller agricultural and commercial bank, but it’s consistently been the go-to for anyone in the crypto space who needs a Maltese bank account that actually works.

Paytah has positioned itself as a crypto-friendly payment provider, but it has had a troubled history in the press and I wouldn’t build anything critical around it.

If crypto transfers are a core requirement — either as an individual or as a business — Agribank is your best bet among local Maltese banks. Pair it with Wise or Revolut for everything else.

Filed under: Banking, Money

Filling in the Modelo 720 for Expats Living in Spain

Last updated: March 12, 202670 Comments

As a foreigner living in Spain, you have the dubious pleasure of having to declare all your assets abroad. Welcome to Spain! In this post, I’ll give you more information about this declaration that is known as modelo 720. If you think it’s ridiculous and unjust I’m totally in agreement. However, unfortunately, there is no way around it.

Major update (2022): In January 2022, the Court of Justice of the European Union ruled that Spain’s Modelo 720 penalty regime was disproportionate and contrary to EU law. The court found that the penalties — which included 150% surcharges and no statute of limitations — violated the free movement of capital. Spain was forced to act, and in March 2022, Law 5/2022 removed the most draconian penalties.

What changed: The 150% surcharges for non-declaration were eliminated. The lack of statute of limitations was removed — standard limitation periods now apply. Undeclared assets abroad are no longer automatically treated as unjustified capital gains from the most recent open tax year.

What didn’t change: The Modelo 720 filing obligation itself remains. You are still required to declare foreign assets exceeding €50,000 per category. There are still penalties for late or incorrect filing, but they are now proportionate and in line with penalties for other informational declarations in Spain.

A note on history: I’ve kept the original content of this article below because it’s important to understand what Spanish tax residents were subjected to for nearly a decade. Spain continued to fine people under the original penalty regime even after the EU Commission had formally told them the penalties were illegal. Catalan courts were overturning fines while Hacienda kept issuing new ones. The fact that it took a formal EU Court ruling — and the threat of massive financial penalties against Spain itself — to force the government to stop this behavior tells you everything you need to know about the Spanish tax authorities’ attitude toward taxpayer rights. The prediction I made in the original article that the EU would force Spain’s hand came true — it just took longer than expected.

Since I received so many requests about this form and how to fill it in, I have asked my trusted accountant if I can forward requests to him directly, in that way you will get professional advice and help (at a reasonable fee) for this complicated and hugely annoying declaration requirement.

Click here to fill in the form if you want to get in touch with my tax lawyer/accountant. Unfortunately, I am not qualified to assist myself due to the inherent complexities of each individual’s financial setup, so the best idea is to put you in touch with the people I trust myself for submitting my own yearly model 720.

If you want to learn more about model 720 before trusting anyone else with you obligations, please continue reading. My advice is to read as much as you can on your financial and tax matters, but ultimately, given the risks involved, it’s better to pay for professionals to handle such stuff.

Spanish tax resident individuals are obliged to report (720 Form) the following assets and rights (including any investments) located outside of Spain to the Tax Authorities:

  • Accounts in which the individual is the titleholder, or in which he is representative, authorized person or beneficiary, or in which he has disposal powers.
  • Securities, rights, insurance and life or temporary annuities.
  • Real estate or rights on real estate.

There will be no reporting obligation for those assets or rights which value (considered in aggregate for each group of assets listed above) is lower than Euros 50,000. The deadline for filing the 720 Form is from 1 January to 31 March of the year following that for which the information must be reported.

In subsequent years you will need to re-submit the modelo 720 if any of the accounts are closed or if the value in any of these three categories increases by 20,000 Euro or more.

This is a form that is quite tricky to fill in, especially for foreigners, and the fines are ridiculously high in the case of mistakes, late submissions or forgetting to submit it altogether. Hence it’s worth paying close attention to it and making sure you do it right, especially if it’s the first year you’re submitting it. I highly suggest you approach a reputable tax consultant to help you out. Note that many accountants, gestores and tax consultants don’t provide help on this form, as they have relatively low demand for it compared to the other services they provide. Expect to pay between 400 and 500 Euro per declaration if you hire a tax consultant (contact me if you need recommendations in Barcelona) to fill it in for you. You will still need to provide all the documents and details to the consultant, what he will be able to do is guide you on what data is needed and actually fill in and submit the form for you.

Many expats simply do not declare the modelo 720, and many are not even aware of it. Unfortunately, they are exposing themselves to serious trouble and harsh penalties. We have seen several cases of financial ruin in the past years due to failure to declare this form or declaring it with erroneous data. The penalties are so harsh that a Spanish consultancy company has denounced Spain to the European Court a few years ago. There are some indications that Hacienda has been softening its hand in terms of fines after the EU requested them to do so, but the case is ongoing.

[Read more…]

Filed under: Expat life

  • « Previous Page
  • 1
  • …
  • 70
  • 71
  • 72
  • 73
  • 74
  • …
  • 90
  • Next Page »

Latest Padel Match

Jean Galea

Investor | Dad | Global Citizen | Athlete

Follow @jeangalea

  • My Padel Experience
  • Affiliate Disclaimer
  • Cookies
  • Contact

Copyright © 2006 - 2026 · Hosted at Kinsta · Built on the Genesis Framework