
Nectaro and PeerBerry are two of the most appealing consumer-loan platforms in Europe, and they’re easy to confuse on paper: both Latvian, both fee-free, both with …

Afranga vs Mintos: Which Is Better in 2026?
Afranga and Mintos represent two different philosophies of P2P investing. Mintos is the sprawling, EUR 12 billion marketplace built on breadth. Afranga is the focused Bulgarian …

How I Reach My Server From Anywhere: Remote Control, Jump Desktop, and Tailscale
I keep my real work on one machine: a server that runs my whole AI setup. It holds everything: the projects, the keys, the local agents, …
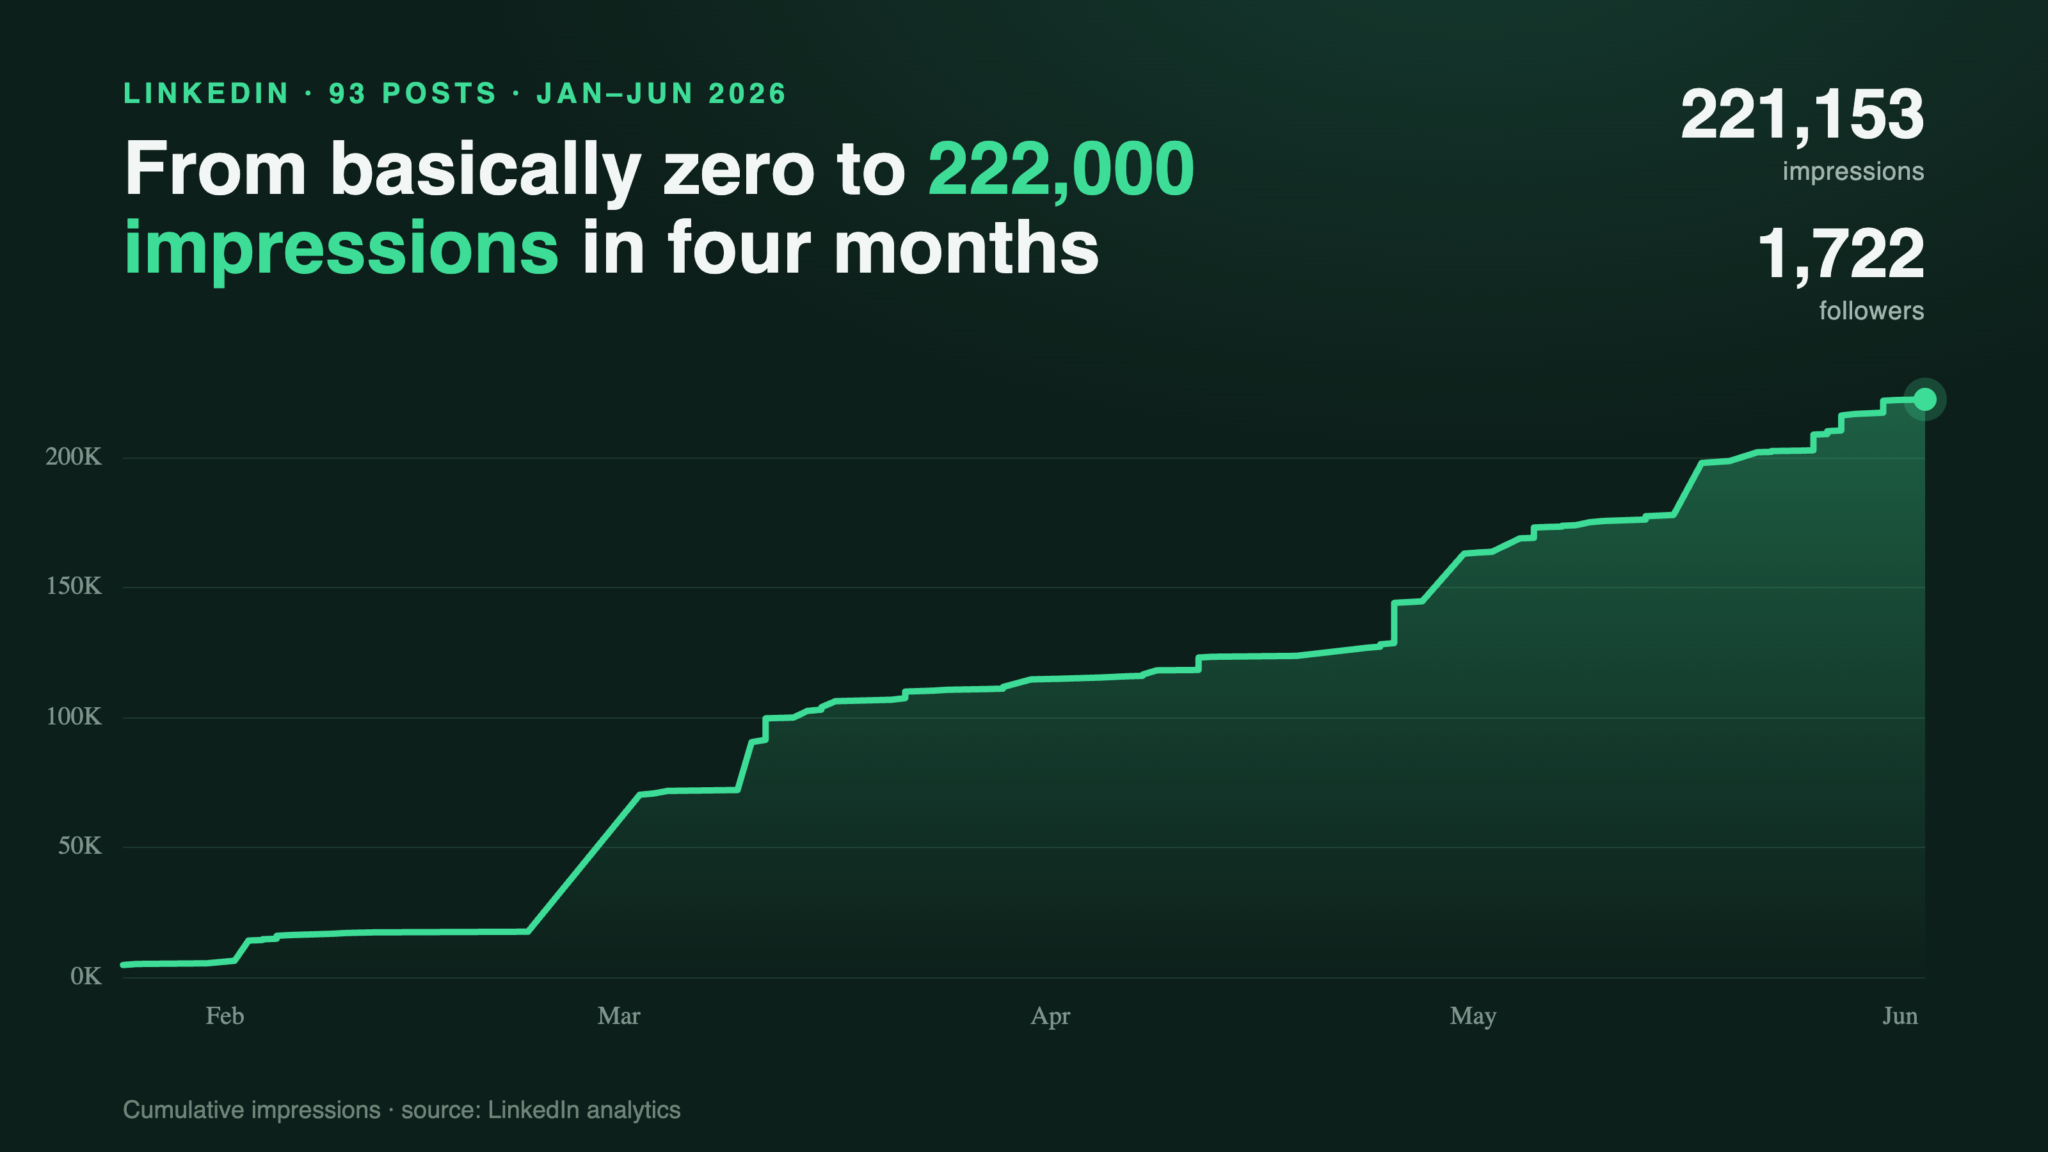
What Four Months of Posting on LinkedIn Taught Me
Late last year I was lost. I’d spent the better part of a decade away from the tech space, and somewhere in those years I’d misplaced …

How to Prepare Your Crypto Taxes in Portugal (2026)
TL;DR: Portugal is no longer crypto tax-free, but it’s still attractive: hold a coin for 365 days or more and the gain is exempt from capital …
Nectaro vs Mintos: Which Is Better in 2026?
Nectaro and Mintos sit at opposite ends of the European P2P spectrum. Mintos is the EUR 12 billion incumbent with 60+ loan originators and a decade …

Auth in 2026: What Replaced wp_users
This is part of an ongoing series I am writing as I work my way through the modern web stack from a WordPress developer’s perspective. It …

How to Prepare Your Crypto Taxes in Malta (2026)
TL;DR: Malta’s “0% crypto tax” reputation is half true. Long-term holdings of coins held as an investment are not subject to capital gains tax, so a …

What to Eat and Drink During a Padel Match
Padel is a game of rallies, sprints, and sudden bursts of intensity. You can go from standing still to chasing a lob in a split second, …

From WPDB to Drizzle, Prisma, and Kysely
This is part of an ongoing series I am writing as I work my way through the modern web stack from a WordPress developer’s perspective. It …

WordPress Isn’t Dying. It Stopped Being the Default.
I’ve made my living from WordPress for twenty years. I’d love to tell you it’s thriving. I can’t, and the most honest evidence I have is …

Beyond Shared MySQL: Cloud Databases for WordPress Developers
This is part of an ongoing series I am writing as I work my way through the modern web stack from a WordPress developer’s perspective. It …
- « Previous Page
- 1
- …
- 3
- 4
- 5
- 6
- 7
- …
- 46
- Next Page »
